

Hand stampModel D65
You are here:
Dater with textplate, model D65IntroductionSample PrintsTechnical DataServiceDownloadAccessoriesContact usFAQ
Dater with textplate, model D65

- lightweight outer frame
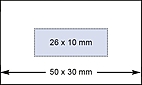
- extra large textplate made to individual requirements
- date in figures or with abbreviated months
- month wheels to suit most languages
- date is set by thumb lever
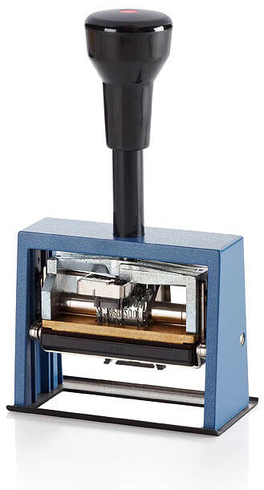
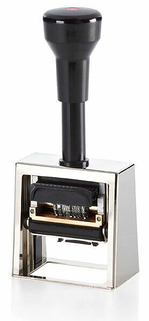
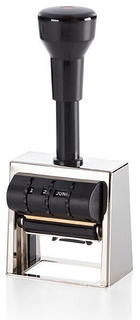
Dater with textplate, model D65
The large but lightweight date stamp model D 65 offers plenty of space for informative text on an extra-large text plate. The brass plate engraving is made to individual requirements. The date is stamped in figures or with abbreviated months. The stamp is available with month wheels in many languages and an adjustable date thumb lever for fast use.
The manufacturing quality of the hand stamp is also outstanding. Made 100% "Made in Germany", the housing and wheels are not made of plastic, but of die-cast zinc. All parts are also assembled in Germany. The result: a date stamp with the highest value.
The manufacturing quality of the hand stamp is also outstanding. Made 100% "Made in Germany", the housing and wheels are not made of plastic, but of die-cast zinc. All parts are also assembled in Germany. The result: a date stamp with the highest value.
| Order No. | Sample Prints | A ↕ | |
|---|---|---|---|
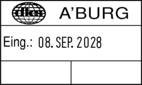
| 231 500-000 | 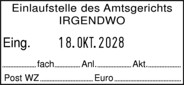 | 4.0 mm | |
| Template | 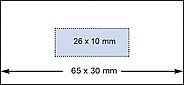 | 4.0 mm |
Technical Data
| Prints: | Date, Text |
|---|---|
| Action: | Thumb lever |
| Textplate size: | 65 x 30 mm, brass unengraved |
| Wheels and body: | Die-cast |
| Figure size: | 4.0 mm |
| Date format: | DE, EN, ARAB, ISO, YY, YYYY |
| Figure style: | Block |
| Net weight: | about 550 g |
You are here:
Advantages at a glance

Made in Germany
Developed, produced and assembled in Germany.
Developed, produced and assembled in Germany.

Mobile use
Portable and flexible integration at any point in the production chain.
Portable and flexible integration at any point in the production chain.

Smudge-proof
No smearing thanks to fast-drying ink.
No smearing thanks to fast-drying ink.

Object diversity
Flexibility of the objects to be printed in the form of round, angular, curved.
Flexibility of the objects to be printed in the form of round, angular, curved.
Download
downloads-intro-rwd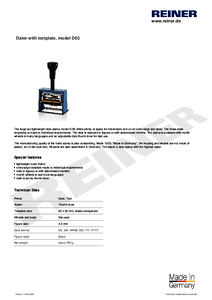


Accessories
Inked Pads incl. Pad HolderblackSuitable for: D65

| Order-No.: | 76093-000 |
|---|---|
| Color: | black |
| Pieces: | 4 |
Inked Pads incl. Pad HolderredSuitable for: D65

| Order-No.: | 76093-001 |
|---|---|
| Color: | red |
| Pieces: | 4 |
Inked Pads incl. Pad HolderblueSuitable for: D65

| Order-No.: | 76093-002 |
|---|---|
| Color: | blue |
| Pieces: | 4 |
Inked Pads incl. Pad HoldergreenSuitable for: D65

| Order-No.: | 76093-003 |
|---|---|
| Color: | green |
| Pieces: | 4 |
MarkingPartner in your area
Your presumed location: 78120 Furtwangen
x
Gravierkunst Wölfle
Habsburgerstraße 121
79104 Freiburg
Habsburgerstraße 121
79104 Freiburg
Phone: 0761 32404
Email: info@gravierkunst-woelfle.de
Email: info@gravierkunst-woelfle.de
Werbewerk24
Lörracher Str. 34
79541 Lörrach
Lörracher Str. 34
79541 Lörrach
Stempel - Hanauer
Hermann-Albrecht-Str. 5
79540 Lörrach
Hermann-Albrecht-Str. 5
79540 Lörrach
Phone: 07621/2193
Email: Th@Stempel-Hanauer.de
Email: Th@Stempel-Hanauer.de
Contact persons
TAUBERT Marcus
Phone: +49 7723 657-384
Email: marcus.taubert@reiner.de
Email: marcus.taubert@reiner.de
BEERMANN Daniel
Phone: +49 7723 657-308
Email: daniel.beermann@reiner.de
Email: daniel.beermann@reiner.de
SCHWANZARA Dominic
Phone: +49 7723 657-398
Email: Dominic.Schwanzara@reiner.de
Email: Dominic.Schwanzara@reiner.de
Similar products
Dater with Textplate, model D53


Dater with textplate, model D53V
FAQ
How do I adjust the number or date?
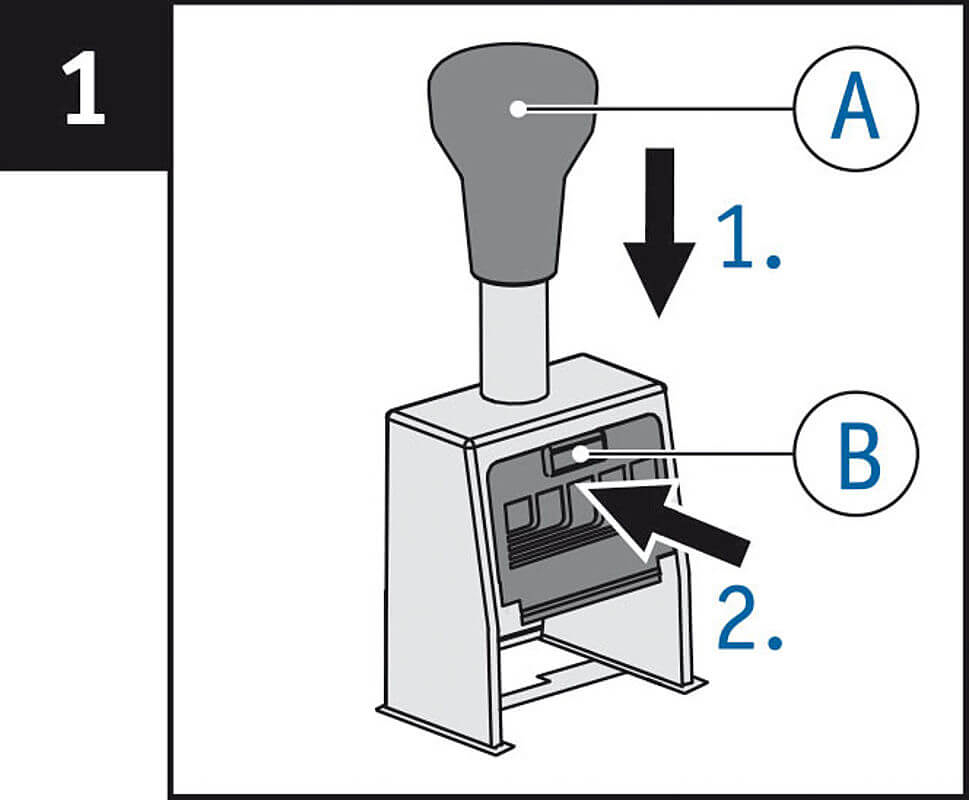
To set the stamp wheels → Fig. 1 + 2
Example B6
> Press the handle A to the bottom of its travel, then while still holding it.
> Press and hold button B on the front plate.
> Allow the handle A to move upwards until the handle locks in place.
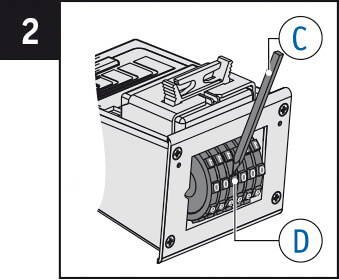
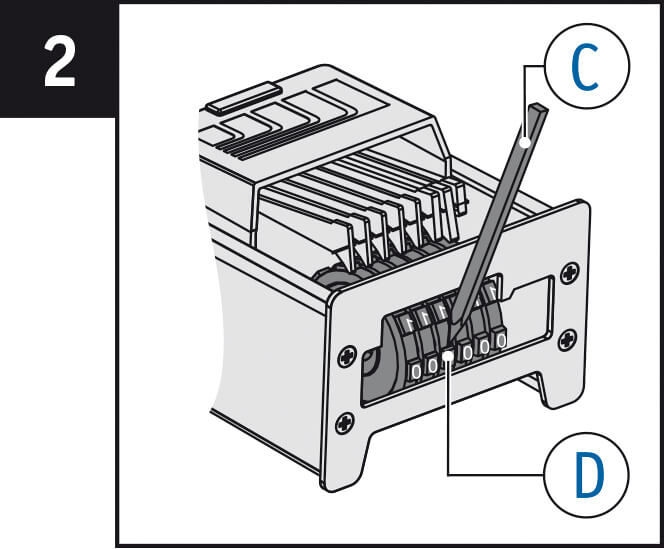
> You will be able to move the stamp wheels D freely with the stylus C.
You can hide preceding zeros in a number!
Example: 49 instead of 000049
> To do this move the stamp wheels D with the adjusting pin C to the empty spaces between “0” and “1”.
> In order to return to the print position, simply push down on handle A.
Note
REINER® date stamps feature a lever mechanism to move the date forward day by day. This lever may also be used to adjust the setting of the wheels. Just press down the lever.
Example B6
> Press the handle A to the bottom of its travel, then while still holding it.
> Press and hold button B on the front plate.
> Allow the handle A to move upwards until the handle locks in place.
> You will be able to move the stamp wheels D freely with the stylus C.
You can hide preceding zeros in a number!
Example: 49 instead of 000049
> To do this move the stamp wheels D with the adjusting pin C to the empty spaces between “0” and “1”.
> In order to return to the print position, simply push down on handle A.
Note
REINER® date stamps feature a lever mechanism to move the date forward day by day. This lever may also be used to adjust the setting of the wheels. Just press down the lever.
How do I remove preceeding zeros from a printed number?
Preceding zeros → Fig. 2
Example: 49 instead of 000049
> Turn the stamp wheel D with stylus C to digit position “0”.
> Using stylus rotate and push down on stamp wheel through a half digit position until it sinks below print height.
> To return to the print position, simply push down on handle A.
Example: 49 instead of 000049
> Turn the stamp wheel D with stylus C to digit position “0”.
> Using stylus rotate and push down on stamp wheel through a half digit position until it sinks below print height.
> To return to the print position, simply push down on handle A.
Exceptions: Mod. B6, B6K, ND6K
Have no drop wheels. You may remove the zero from printing by turning the wheel “half way” to “1”.
> To do this move the stamp wheels D with the adjusting pin C to the empty spaces between “0” and “1”.
Note
Date stamps do not feature wheels that can retract.
Have no drop wheels. You may remove the zero from printing by turning the wheel “half way” to “1”.
> To do this move the stamp wheels D with the adjusting pin C to the empty spaces between “0” and “1”.
Note
Date stamps do not feature wheels that can retract.
How do I set a date?
REINER® date stamps in general feature a lever to set the date. Just press the lever to turn the wheels.
Alternatively use a stylo and refer to “How do I adjust the number or date” an “How do I lock a stamp in its parking position”.
Alternatively use a stylo and refer to “How do I adjust the number or date” an “How do I lock a stamp in its parking position”.
How to change an ink cartridge?
To insert the inkpad → Fig. 1 + 3
Note: Use only oil-containing stamp ink.
Handle with caution to avoid dirt from ink!
> Press the handle A to the bottom of its travel, then while still holding it.
> Press the button B on the front plate and continue to hold it pressed.
> Allow the handle A to move upwards until the handle locks in place.
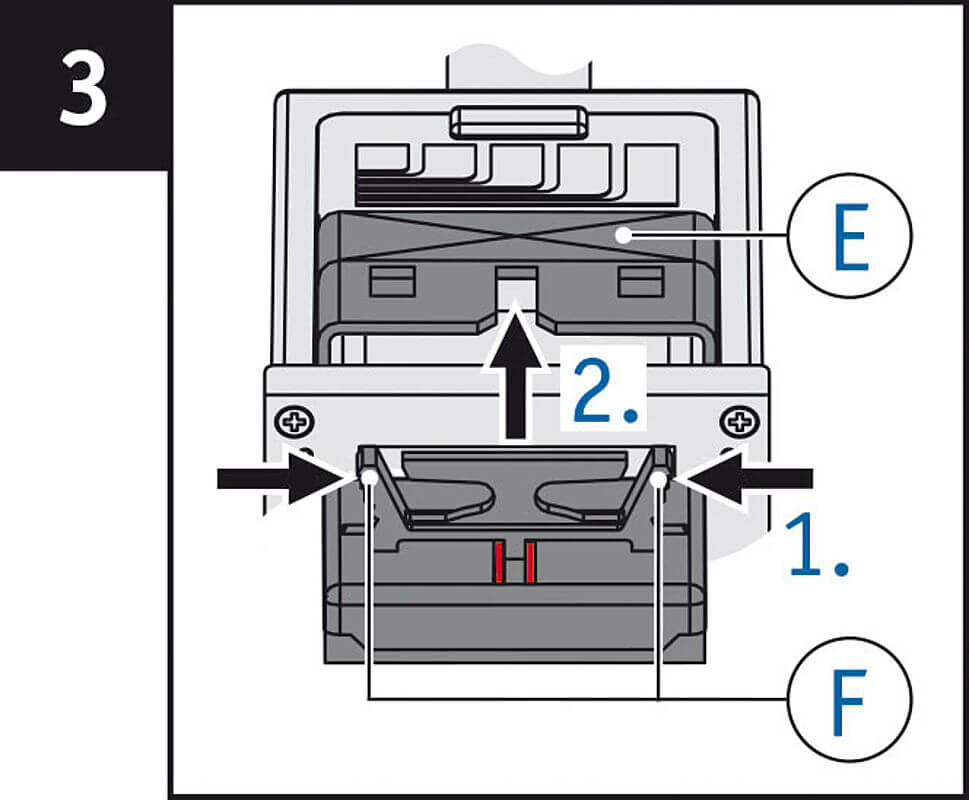
> Unpack the inkpad carefully.
> Squeeze the grips F on the back of the inkpad and hold them.
> Resting the back of the ink pad inside the pad cradle slide the pad into the slot F of the stamp.
> In order to return to the print position, simply push down on handle E.
Note: Use only oil-containing stamp ink.
Handle with caution to avoid dirt from ink!
> Press the handle A to the bottom of its travel, then while still holding it.
> Press the button B on the front plate and continue to hold it pressed.
> Allow the handle A to move upwards until the handle locks in place.
> Unpack the inkpad carefully.
> Squeeze the grips F on the back of the inkpad and hold them.
> Resting the back of the ink pad inside the pad cradle slide the pad into the slot F of the stamp.
> In order to return to the print position, simply push down on handle E.
How do I lock a stamp in its parking position?
To park the stamp → Fig. 5
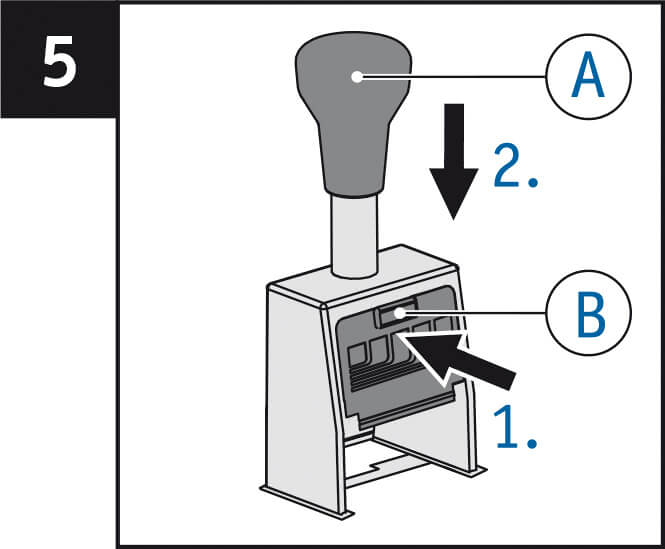
To prolong the life of the inkpad, park the stamp!
> Press and hold button B on the front plate.
> Gently push handle A downwards until the stamp clicks & locks in a raised position.
> In order to return to the print position, simply push down on handle A.
Note
Some REINER® models feature a metal locking plate sitting inside the outer frame, or some older designs have a locking pin placed at the spring tube below the handle.
How do I unlock a stamp from its parking position?
Unlocking the stamp → Fig. 5
> In order to return to the print position, simply push down on handle A.
Note
Press back locking pin – e.g. model TA, K1.
> In order to return to the print position, simply push down on handle A.
Note
Press back locking pin – e.g. model TA, K1.
How to change an ink cartridge?
To insert the inkpad → Fig. 1 + 3
Note: Use only oil-containing stamp ink.
Handle with caution to avoid dirt from ink!
> Press the handle A to the bottom of its travel, then while still holding it.
> Press the button B on the front plate and continue to hold it pressed.
> Allow the handle A to move upwards until the handle locks in place.
> Unpack the inkpad carefully.
> Squeeze the grips F on the back of the inkpad and hold them.
> Resting the back of the ink pad inside the pad cradle slide the pad into the slot F of the stamp.
> In order to return to the print position, simply push down on handle E.
